

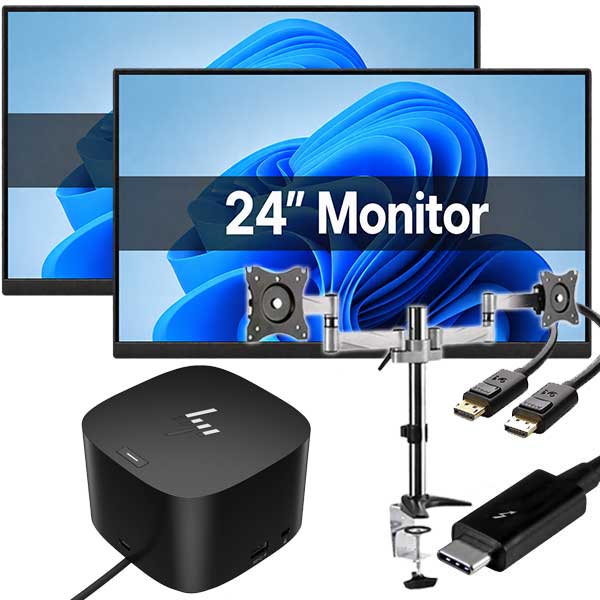



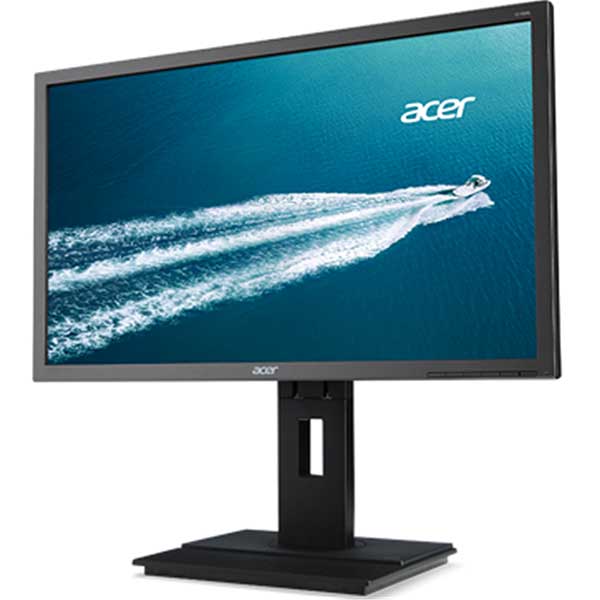

Is your computer monitor displaying a black screen, showing “No Signal”, or not being detected by Windows? Perhaps you have two monitors connected, but only one is working?
Monitor problems can be frustrating, particularly when your computer appears to be operating normally. Fortunately, many display issues can be resolved with a few straightforward troubleshooting steps.
At NZ Laptop Wholesale, we regularly help customers with laptops, desktop computers, refurbished monitors and dual-screen setups. This guide explains how to identify the likely cause of a monitor problem before assuming the screen itself is faulty.
Quick Fix: One of Your Two Monitors Isn’t Working?
Start by swapping the display cables between your two monitors. This is one of the simplest ways to determine whether the problem is with a monitor, video cable, docking station or computer connection.
- Identify which monitor is working and which isn’t.
- Turn both monitors off.
- Disconnect the display cable from the back of each monitor.
- Swap the monitor-end connections, so the previously working cable is connected to the monitor that wasn’t working.
- Leave the cables connected to their original computer or docking station ports.
- Turn both monitors back on and check the results.
Important: Both monitors must have compatible video connections for this test. If they use different types of connectors, use a compatible known-working cable instead. Ensure each monitor has the correct input selected.
What does the result mean?
- The previously blank monitor now works: the monitor itself is probably fine. The problem may be with the other cable, computer output or docking station connection.
- The same monitor remains blank: investigate its power, input selection and video input. The monitor itself may have a fault.
- Both monitors work: the issue may have been a loose connection or a temporary display detection problem.
This test narrows down the possibilities but does not always identify the exact faulty component. Continue below if the issue remains unresolved.
1. Check That the Monitor Has Power
Before investigating Windows or the computer, make sure the monitor is actually receiving power.
- Check that the monitor’s power cable is connected securely.
- Make sure the power socket or power board is switched on.
- Press the monitor’s physical power button.
- Look for a power indicator light, if fitted.
- Try opening the monitor’s built-in menu using its physical buttons.
- If necessary, test another power outlet.
If the monitor displays its own menu or a “No Signal” message, the screen is receiving power and is capable of showing an image.
If there are no lights, no menu and no response, investigate the power supply or power connection. If your monitor uses an external power adapter, only test with a compatible adapter of the correct specification.
2. Check the Monitor’s Input Source
Most modern monitors have more than one video input. Depending on the model, these may include:
- HDMI
- DisplayPort (DP)
- DVI
- VGA
- USB-C video input
Using the buttons on your monitor, open its settings menu and look for Input Source, Source or Input Select.
Select the input that matches the connection you are using. For example, if your computer is connected using a DisplayPort cable, select DisplayPort rather than HDMI.
Some monitors automatically detect the correct input, while others require manual selection.
3. Check and Reseat the Display Cables
A loose, damaged or incorrectly connected video cable is a common cause of display problems.
- Turn off the affected monitor.
- Unplug the video cable from the monitor.
- Unplug the other end from the computer or docking station.
- Inspect both connectors for visible damage or bent pins.
- Reconnect the cable firmly at both ends.
- Check that the cable is not under tension or sharply bent.
- Turn the monitor back on.
DisplayPort cables may have a locking connector. If yours has a release button, press it before removing the cable. Never force the connector.
If possible, test with a different cable of the same connection type.
A Note About Video Adapters
If you’re using HDMI-to-DisplayPort, DisplayPort-to-HDMI, USB-C-to-HDMI or another type of video adapter, the adapter could also be responsible.
Some adapters only work in one direction. For example, a DisplayPort-to-HDMI adapter generally cannot be used in reverse to send an HDMI signal into a DisplayPort monitor.
Where possible, temporarily remove adapters and connect the monitor directly using a compatible cable.
4. Test Each Monitor Separately
If you have a dual-monitor setup, testing each screen individually is an excellent way to isolate the issue.
- Disconnect both monitors from the computer or dock.
- Connect only the first monitor using a known-working cable and video output.
- Confirm whether it displays an image.
- Disconnect it and connect the second monitor to the same working cable and output.
- Check whether the second monitor displays an image.
- Once both monitors work separately, reconnect both together.
If both screens work individually but not together, the problem may involve Windows display settings, a computer graphics limitation, docking station compatibility or the combination of video outputs being used.
If one monitor fails even when connected to a known-working cable and output, the fault is more likely associated with that monitor or its selected input.
5. Swap the Monitor Cables and Test the Computer Ports
For dual-monitor troubleshooting, it helps to distinguish between two different tests.
Test A: Swap the Connections at the Monitors
Keep each video cable in its existing computer or docking station port. Swap only the ends connected to the monitors, as described in the quick fix above.
This helps establish whether the working video signal can be displayed by the previously blank monitor.
Test B: Swap the Computer or Docking Station Outputs
Return the monitor cables to their original screens. Now swap the connections at the computer or docking station, provided the ports are compatible.
If the problem follows a particular output port, the issue may involve that port, its configuration, the dock or the computer’s graphics system.
If the problem follows a particular cable, test another known-working cable.
Tip: Change one connection at a time and note what happens. Swapping every connection at once can make the results difficult to interpret.
6. Check Windows Display Settings
Sometimes both monitors are connected correctly, but Windows isn’t configured to use them.
Use Windows + P
- Press the Windows key + P on your keyboard.
- A display selection menu should appear.
- Select Extend to use your monitors as separate screens.
- Wait a few seconds for the displays to respond.
The available modes include:
- PC screen only: uses the main computer display.
- Duplicate: shows the same image on multiple displays.
- Extend: expands your desktop across multiple monitors.
- Second screen only: uses the external display configuration.
For most dual-monitor workstations, Extend is the preferred setting.
Manually Detect Your Monitor
On Windows 11:
- Right-click an empty area of your desktop.
- Select Display settings.
- Scroll down and expand Multiple displays.
- Click Detect.
- If Windows detects the missing monitor, select the appropriate display arrangement.
You can also click Identify to display a number on each recognised monitor. Drag the numbered display boxes to match the physical arrangement of your screens.
If Windows detects the second monitor but it remains blank, check that it is enabled for an extended desktop rather than disconnected in the display configuration.
7. Restart the Computer and Reset the Display Connection
A temporary software or connection problem can sometimes prevent a monitor from being recognised.
Try the following:
- Save your work and restart Windows using Start > Power > Restart.
- Switch off the affected monitor and disconnect its power for approximately 30 seconds.
- Reconnect the power and turn the monitor on.
- Disconnect and reconnect the video cable.
- Check Windows Display settings again.
You can also try the Windows graphics reset shortcut:
Windows + Ctrl + Shift + B
Press all four keys together. Windows will attempt to reset its graphics driver. You may hear a beep or see the screens briefly flicker.
This does not normally restart the computer or close your applications.
8. Troubleshooting Monitors Connected to a Docking Station
Docking stations are popular with business laptops because they allow multiple monitors, keyboards, mice and other devices to connect through one laptop connection.
However, docking stations introduce an additional component that may need troubleshooting.
Check the Docking Station
- Confirm that the docking station has its correct power adapter connected, if required.
- Check the USB-C, Thunderbolt or other host cable between the dock and laptop.
- Reconnect the host cable firmly.
- Check that both monitor cables are connected to the correct video outputs.
- Test each monitor individually through the dock.
- Try a different compatible output on the dock, if available.
- Check whether the laptop supports the monitor configuration being used.
Power Cycle the Dock
If the docking station is not responding correctly:
- Save your work.
- Disconnect the docking station from the laptop.
- Disconnect the docking station’s power supply.
- Wait approximately 30 seconds.
- Reconnect the docking station power supply.
- Reconnect the laptop.
- Check whether both monitors now work.
This is a general power-cycle procedure. Some docks have model-specific reset instructions, so follow the manufacturer’s documentation where applicable.
Check Dock Compatibility and Drivers
Not every USB-C port supports video output, and not every laptop can drive two external monitors through every dock.
Depending on the model, the system may use USB-C DisplayPort Alternate Mode, Thunderbolt, USB4 or DisplayLink technology.
Some USB-based DisplayLink docking stations require additional software to be installed before the monitors will work.
If your dock previously worked and has suddenly stopped recognising one screen, check for manufacturer-approved graphics drivers, docking station drivers and firmware updates.
Only install software and firmware from official manufacturer sources. Do not interrupt firmware updates.
Important: USB-C Does Not Always Mean Video Support
Although USB-C connectors look alike, their capabilities vary. Some support charging and data only, while others also support external video displays.
Similarly, a docking station with multiple video ports does not necessarily support every port being used simultaneously.
9. Check Your Graphics Drivers
If Windows suddenly stops detecting a monitor, a display driver problem may be responsible.
- Right-click the Windows Start button.
- Select Device Manager.
- Expand Display adapters.
- Look for your Intel, AMD or NVIDIA graphics device.
- Check for warning symbols or reported errors.
- Visit the computer manufacturer’s support website to check for a suitable graphics driver update.
You can also check Settings > Windows Update for relevant system and driver updates.
If the problem started immediately after a driver update, an experienced user may wish to check the driver’s Roll Back Driver option under Device Manager > Display adapters > Properties > Driver.
Caution: Avoid uninstalling graphics drivers or changing advanced driver settings unless you are comfortable troubleshooting Windows or have been advised to do so by a technician.
10. Check the Monitor Resolution and Refresh Rate
Occasionally, an unsupported display mode can cause a black screen, flickering or an “Out of Range” message.
- Right-click the Windows desktop and select Display settings.
- Select the affected display, if Windows recognises it.
- Check its display resolution.
- Choose the monitor’s recommended or native resolution.
- Open Advanced display to review its refresh rate.
- Try a supported refresh rate, such as 60Hz, if appropriate for the monitor.
For example, many standard business Full HD monitors operate at 1920 x 1080 and 60Hz. Higher-resolution or gaming monitors may support different settings.
Consult your monitor specifications before selecting a display mode. The available refresh rates also depend on the cable, computer and docking station.
11. Identify Common Monitor Symptoms
| Symptom | Possible Cause | What to Try |
|---|---|---|
| No power light or menu | Power connection, adapter or monitor fault | Check the power outlet, cable and compatible power supply. |
| “No Signal” message | Incorrect input, loose cable or no video output | Check the input source and reseat or swap the video cable. |
| One of two monitors is blank | Cable, display configuration, dock or port | Swap monitor cables and test each screen separately. |
| Monitor detected but black | Display mode, resolution or graphics problem | Check Windows display settings and supported display modes. |
| Screen flickers or cuts out | Loose cable, signal quality, adapter or driver | Try a shorter known-working cable, suitable refresh rate and driver checks. |
| Wrong colours or distorted image | Cable, display settings or hardware issue | Reseat the cable, reset monitor picture settings and test another device. |
| Screen is very dim | Brightness settings, power-saving feature or hardware problem | Check monitor brightness and its on-screen menu. |
| Both screens display the same image | Duplicate mode or video splitter | Choose Extend in Windows and confirm independent outputs are supported. |
| Monitor works directly but not through dock | Dock, host cable, compatibility or software | Power cycle the dock and check firmware, drivers and supported outputs. |
| Windows cannot detect the monitor | Connection, display output or graphics issue | Use Detect, try another port and test with a known-working monitor. |
12. What If the Monitor Still Doesn’t Work?
If you’ve completed the steps above, try connecting the affected monitor directly to another compatible laptop or desktop computer using a known-working video cable.
This provides an independent test of the monitor.
- Works on another computer: investigate the original computer, video output, docking station or configuration.
- Doesn’t work on another computer: the monitor or its selected input may have a hardware problem, especially if you have ruled out the cable.
- Works alone but not with a second monitor: investigate dual-display support, graphics settings and docking station limitations.
Don’t open the monitor casing or attempt internal electrical repairs. Monitors and their power components can contain hazardous voltages even after being unplugged.
13. Frequently Asked Questions
Why is my second monitor not detected?
Common causes include a loose or faulty display cable, incorrect input selection, Windows display settings, incompatible docking station connections or graphics driver issues. Start by swapping the monitor cables and checking Windows Display settings.
Why does my monitor say “No Signal”?
This normally means the monitor is powered on but isn’t receiving a usable video signal through the selected input. Check the computer is running, select the correct input and test the video cable.
Can a faulty HDMI or DisplayPort cable cause a black screen?
Yes. A damaged, loose or unsuitable video cable can prevent an image from appearing, or cause intermittent flickering and signal loss. Testing with a known-working cable is a useful first step.
Why does one monitor work but the other doesn’t?
The problem may involve the second monitor, its cable, its input selection, a computer video output or the docking station. Testing both monitors with the same known-working cable and output helps narrow down the cause.
Can I connect two monitors to my laptop?
Many modern laptops support two external monitors, but the number of displays and supported resolutions depend on the laptop graphics hardware, connections and docking station. Check the specifications for your particular laptop and dock.
Will an HDMI splitter give me two separate desktops?
A standard HDMI splitter normally duplicates a single video signal onto multiple screens. To extend your desktop independently, you need suitable independent display outputs or a compatible docking station or display adapter.
Why has my monitor stopped working after a Windows update?
A graphics driver change, display configuration change or temporary detection problem may be involved. Restart the computer, check Display settings and review graphics driver updates or rollback options if the problem began immediately after an update.
14. Need Further Help With Your Monitor?
If you’ve worked through these troubleshooting steps and the monitor is still not functioning correctly, we’re happy to help you identify the next steps.
When contacting NZ Laptop Wholesale, please include:
- The make and model of your monitor.
- The make and model of your laptop or desktop computer.
- Whether you’re using a docking station, and its model.
- The type of video cable being used (HDMI, DisplayPort, USB-C, etc.).
- Whether the monitor powers on or displays “No Signal”.
- The results of swapping cables and testing each monitor separately.
- Any relevant photos or screenshots of Windows Display settings.
These details can make it much easier to determine whether the issue relates to the monitor, video cable, computer or docking station.
NZ Laptop Wholesale – Local NZ Support
We supply professionally refurbished business-grade laptops, desktop computers, monitors and accessories throughout New Zealand.
Every refurbished monitor we sell is tested before dispatch, and our team is available to assist customers with setup and troubleshooting.
Need assistance? Contact us at sales@nzlw.co.nz or phone 09 282 3199.
Visit NZ Laptop Wholesale for our range of refurbished IT equipment and accessories.


