
General
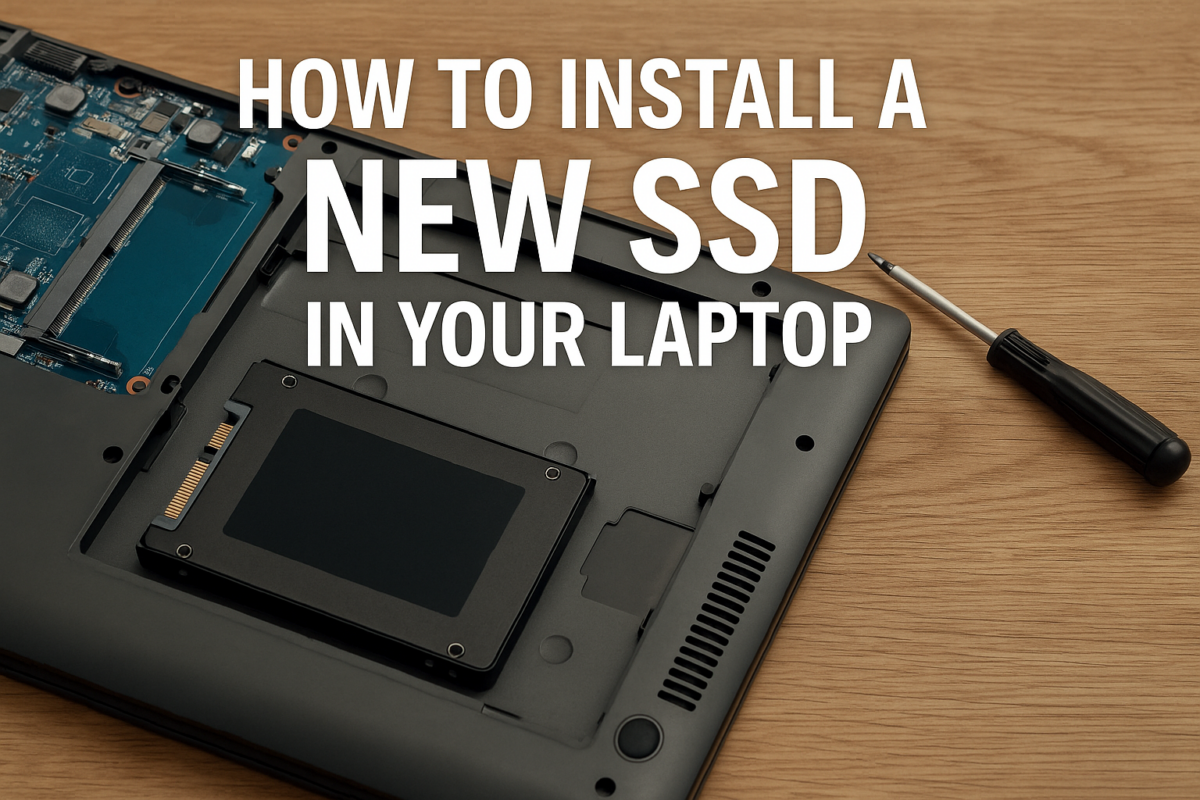
How to Install a New SSD in Your Laptop (With Free Tools)
Upgrading your laptop with a solid-state drive (SSD) is one of the best ways to boost speed, performance, and overall lifespan — especially for refurbished laptops. Whether you’re replacing a slow hard drive or upgrading a smaller SSD, this guide walks you through the process step-by-step using free tools.
🧠 Why Upgrade to an SSD?
- Faster boot times and app loading
- Better battery life
- No moving parts = fewer failures
- Quieter and cooler operation
If your current drive is a traditional HDD or a small 128GB SSD, upgrading to a larger or faster SSD will breathe new life into your machine.
🧰 What You’ll Need
- A compatible 2.5″ SATA SSD or M.2 SSD (check your laptop model first)
- A small screwdriver (usually Phillips)
- Optional: SATA-to-USB cable for cloning
- Optional: free cloning software (Macrium Reflect, AOMEI Backupper)
💡 Need help picking the right SSD? Contact NZ Laptop Wholesale — we’ll match you with the best option for your device.
🪛 Step-by-Step: How to Physically Install the SSD
- Shut down your laptop completely
- Unplug power and any accessories
- Remove the battery (if removable)
- Unscrew the back cover (usually 1–10 screws)
- Locate the existing drive
- Remove the old drive (usually held by 1–2 screws or a bracket)
- Insert the new SSD into the same connector
- Secure it with screws or clips
- Replace the cover and battery
That’s it! Your laptop now has a fresh drive.
💾 Cloning Your Old Drive (Optional, but Recommended)
Want to keep your Windows installation, programs, and files?
- Plug in your new SSD using a USB-to-SATA cable
- Download a free tool like Macrium Reflect
- Select your existing drive and clone it to the SSD
- Swap the SSD into the laptop
- Boot up — it should be exactly like before, just faster
🛠️ NZ Laptop Wholesale sells tested SSDs and cloning kits — just ask!
🚀 Clean Install Windows (Alternative Option)
If you want a fresh start:
- Create a Windows 11 install USB using the Media Creation Tool
- Boot into the USB
- Install Windows onto the new SSD
- Activate Windows with your digital license (usually automatic)
✅ Final Thoughts
Installing an SSD is easier than most people think — and the payoff is huge.
At NZ Laptop Wholesale, many of our refurbished laptops come with SSDs already installed — but if you want to upgrade, we’re here to help.