General
pihole and a cheap Mini PC
Before we begin, let’s take a moment to understand what Pi-hole is and why you might want to use it. Pi-hole is a network-level advertisement and internet tracker-blocking application. It runs on a Raspberry Pi or any other supported device, and it blocks ads and trackers before they even reach your device, making your internet browsing faster and more secure. By setting up Pi-hole on a mini PC, you can enjoy its benefits on a larger scale.
So, without further ado, let’s get started!
Step 1: Hardware requirements
To set up a Pi-hole with Ubuntu Server on a mini PC, you will need the following hardware:
- A mini PC (We have many available – Link)
- A USB Drive (at least 8GB) or an external hard drive
- An ethernet cable
- A power supply for the mini PC
Step 2: Download Ubuntu Server
The first step is to download Ubuntu Server. You can download the latest version of Ubuntu Server from the official website. Make sure to select the 64-bit version.
Step 3: Install Ubuntu Server on the mini PC
Once you have downloaded Ubuntu Server, you need to install it on the mini PC. The installation process is straightforward, and you can follow the instructions on the Ubuntu website. You can install Ubuntu Server on a microSD card or an external hard drive.
Step 4: Connect to the mini PC
Once you have installed Ubuntu Server on the mini PC, you need to connect to it. Connect the mini PC to your router using an ethernet cable, and power it up. Once the mini PC is up and running, you need to find its IP address. You can do this by logging in to your router’s web interface and looking for the connected devices. Alternatively, you can use an IP scanner tool to find the IP address.
Step 5: Install Pi-hole
Once you have connected to the mini PC and found its IP address, you can install Pi-hole. Open a terminal window on your computer and connect to the mini PC using SSH. You can use the following command to connect:
ssh username@ip-address
Replace “username” with your username and “ip-address” with the IP address of the mini PC.
Once you are connected to the mini PC, you can install Pi-hole using the following command:
curl -sSL https://install.pi-hole.net | bash
Follow the instructions on the screen to complete the installation. You will be asked to configure Pi-hole, including the IP address and DNS server settings.
Step 6: Configure Pi-hole
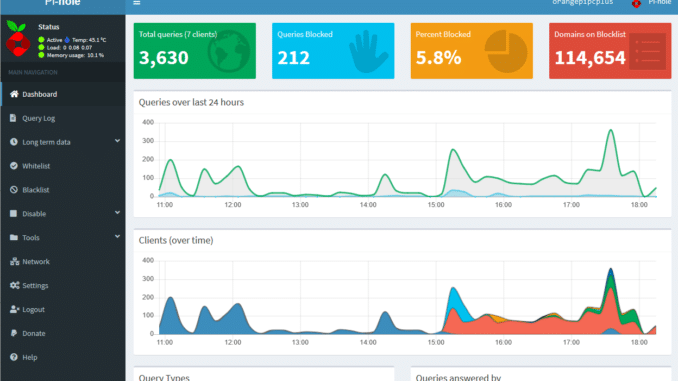
Once Pi-hole is installed, you need to configure it to work with your network. Open a web browser and enter the IP address of the mini PC followed by “/admin” (e.g., http://ip-address/admin). This will take you to the Pi-hole web interface.
In the web interface, you can configure Pi-hole to block ads and trackers, whitelist or blacklist domains, and view statistics. You can also configure the DNS server settings of your network to use Pi-hole as the primary DNS server.
Conclusion
Setting up a Pi-hole with Ubuntu Server on a mini PC is a great way to block ads and trackers on your network. With Pi-hole, you can enjoy faster and more secure internet browsing, and you can easily configure it to work with your network. By following the steps outlined in this blog post, you can set up a Pi-hole on a mini PC in no time.


